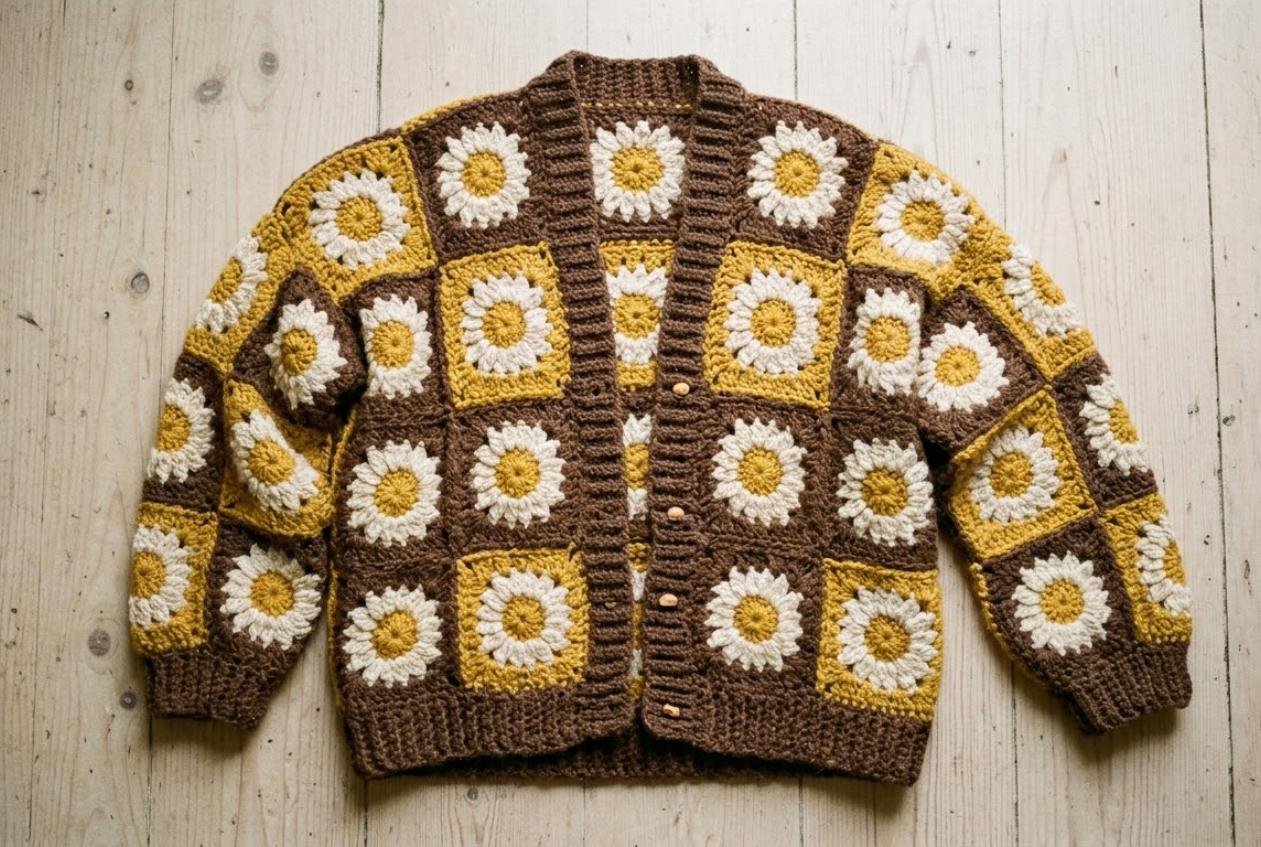
Mustard, cream and chocolate brown daisies — the retro daisy granny square cardigan is pure 70s charm, and it’s trending on Pinterest and Etsy right now. The hardest part of any granny square cardigan isn’t the squares, it’s the layout. This guide gives you the daisy square pattern, a simple layout for every size and an easy join.
Materials
- Worsted (#4) yarn in 3–4 colors (example: mustard, cream, brown, sage) — about 800–1,200 g total
- 5 mm (US H-8) hook
- Yarn needle, stitch markers
Square size: about 12 cm (4.75 in).
Abbreviations (US): MR, ch, sl st, sc, dc, sp, puff = (yo, insert, pull up a loop) x 3 in the same st, yo, pull through all 7 loops.
Step 1: The retro daisy square
- Rnd 1 (center, mustard): ch 3 (counts as dc), 11 dc in MR. Join. (12) Fasten off.
- Rnd 2 (petals, cream): join in any st. Ch 2, puff in the same st, ch 2, puff in the next st, ch 2 around. Join. (12 petals) Fasten off.
- Rnd 3 (square up, brown): join in any ch-2 sp. Ch 3, (2 dc, ch 2, 3 dc) in the same sp — corner. 3 dc in each of the next 2 ch-2 sps, then a corner in the next sp; repeat around, ending with 3 dc in the last 2 sps. Join.
- Rnd 4 (frame, sage or brown): sl st to the corner sp. Work (3 dc, ch 2, 3 dc) in each corner and 3 dc in each space between groups. Join and fasten off.
Make one square, wash it and measure it — your layout depends on this number.
Step 2: Plan your layout
A granny square cardigan is 3 panels plus 2 sleeves:
[ Sleeve ] [ L Front ][ BACK ][ R Front ] [ Sleeve ]
Back width = half your bust + 5–10 cm ease. Each front = half the back width (they meet in the middle).
Squares per size (12 cm squares)
| Size | Bust | Back (W x H) | Each front (W x H) | Each sleeve (W x L) | Total squares |
|---|---|---|---|---|---|
| S | 86 cm | 4 x 5 | 2 x 5 | 3 x 4 | 64 |
| M | 96 cm | 4 x 5 | 2 x 5 | 3 x 4 | 64 |
| L | 106 cm | 5 x 5 | 2.5* x 5 | 3 x 4 | 74 |
| XL | 116 cm | 5 x 6 | 2.5* x 6 | 4 x 4 | 92 |
| 2X | 126 cm | 6 x 6 | 3 x 6 | 4 x 4 | 104 |
* Half squares: make half-granny triangles, or add 2 rounds of border to the front edges instead.
Tip: to make it longer, add a row of squares to the back and fronts — or a deep ribbed hem.
Step 3: Join the squares
Join-as-you-go (recommended): on the last round of each new square, replace the ch-2 at corners and the space between groups with a sl st into the neighboring square. No sewing!
Or slip stitch join: hold two squares wrong sides together and sl st through the back loops along the edge. Creates a neat ridge.
Join in this order:
- Back panel (rectangle).
- Each front panel.
- Each sleeve as a rectangle, then fold and seam into a tube.
Step 4: Assemble
- Lay the back flat. Place the fronts on top, outer edges matching.
- Seam the shoulders (top edge of each front to the back), leaving the center open for the neck.
- Seam the sides from the hem up, leaving 1–2 squares open at the top for armholes.
- Sew the sleeve tubes into the armholes.
Step 5: Borders
- Body band: 4–6 rows of hdc around the fronts, neck and hem. Add buttonholes if you like.
- Cuffs: 4 rounds of front post/back post dc ribbing.
Time: 25–40 hours.
Retro color palettes
| Vibe | Center | Petals | Square | Frame |
|---|---|---|---|---|
| Classic 70s | mustard | cream | brown | brown |
| Sage daisy | yellow | white | sage | cream |
| Sweet pastel | yellow | white | pink | cream |
| Moody | orange | cream | black | black |
FAQ
How many granny squares for a cardigan?
About 60–110 squares of 12 cm depending on size. Use the table above.
What is join-as-you-go?
You attach each new square to the last ones while crocheting its final round, so there’s no sewing at the end.
Can I use any square?
Yes — the layout works for any 12 cm square, like a sunburst or classic granny. → How to crochet a granny square
Ready for some 70s magic? Save this to your Granny Square Cardigans board and tap through to Crochetips for the full pattern and layout.