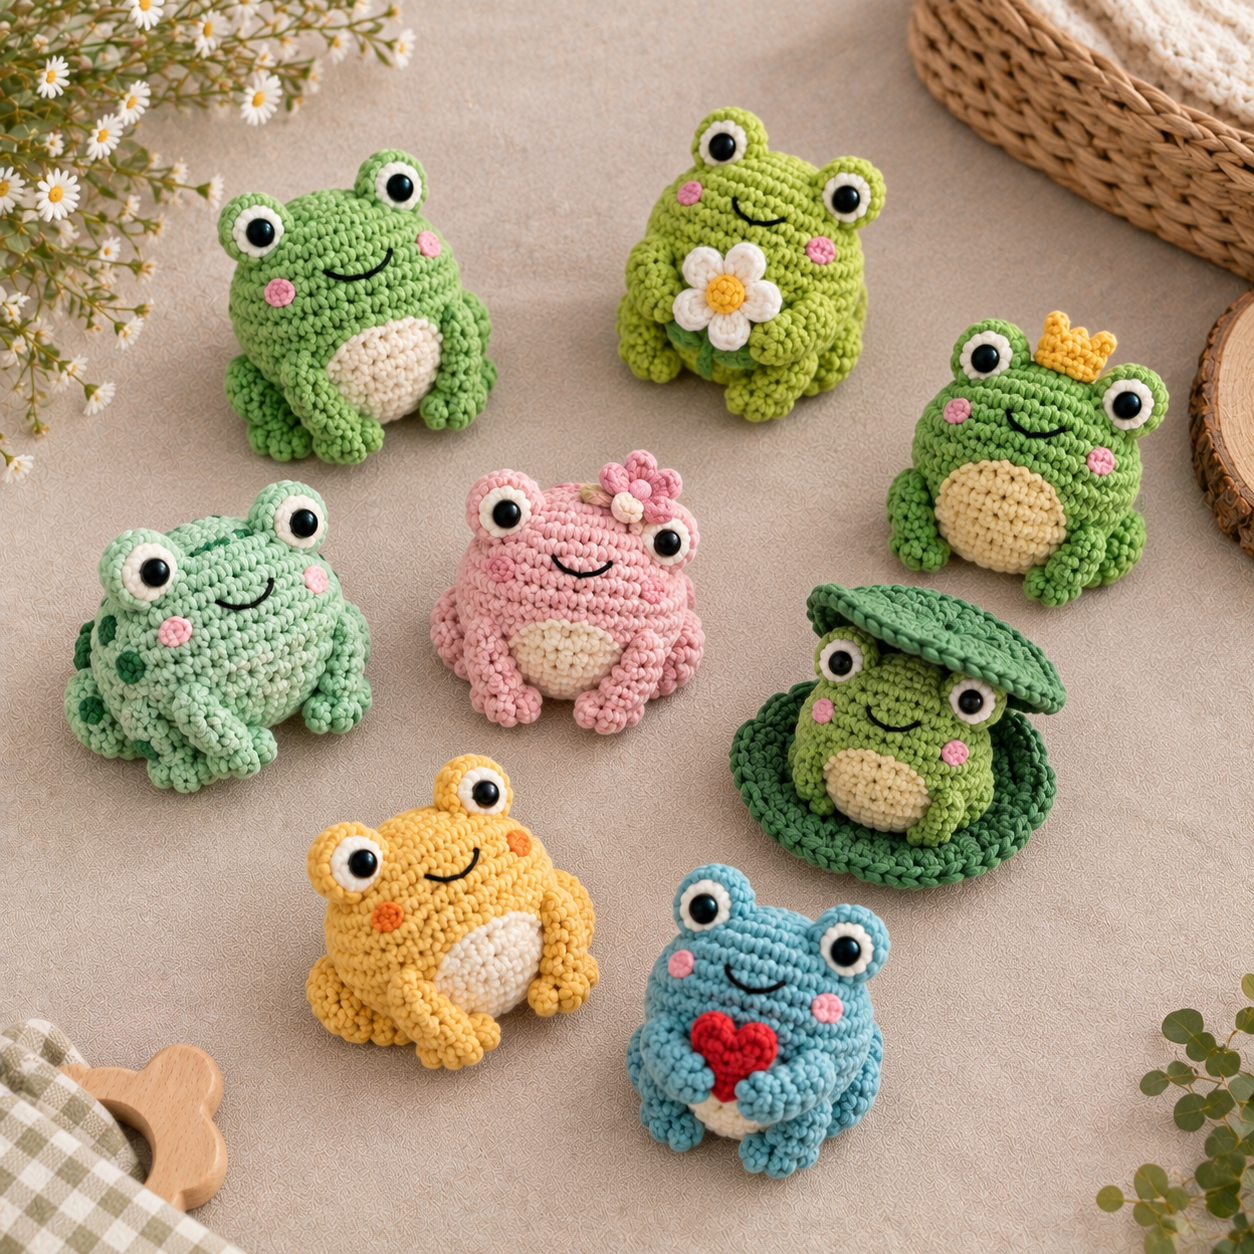
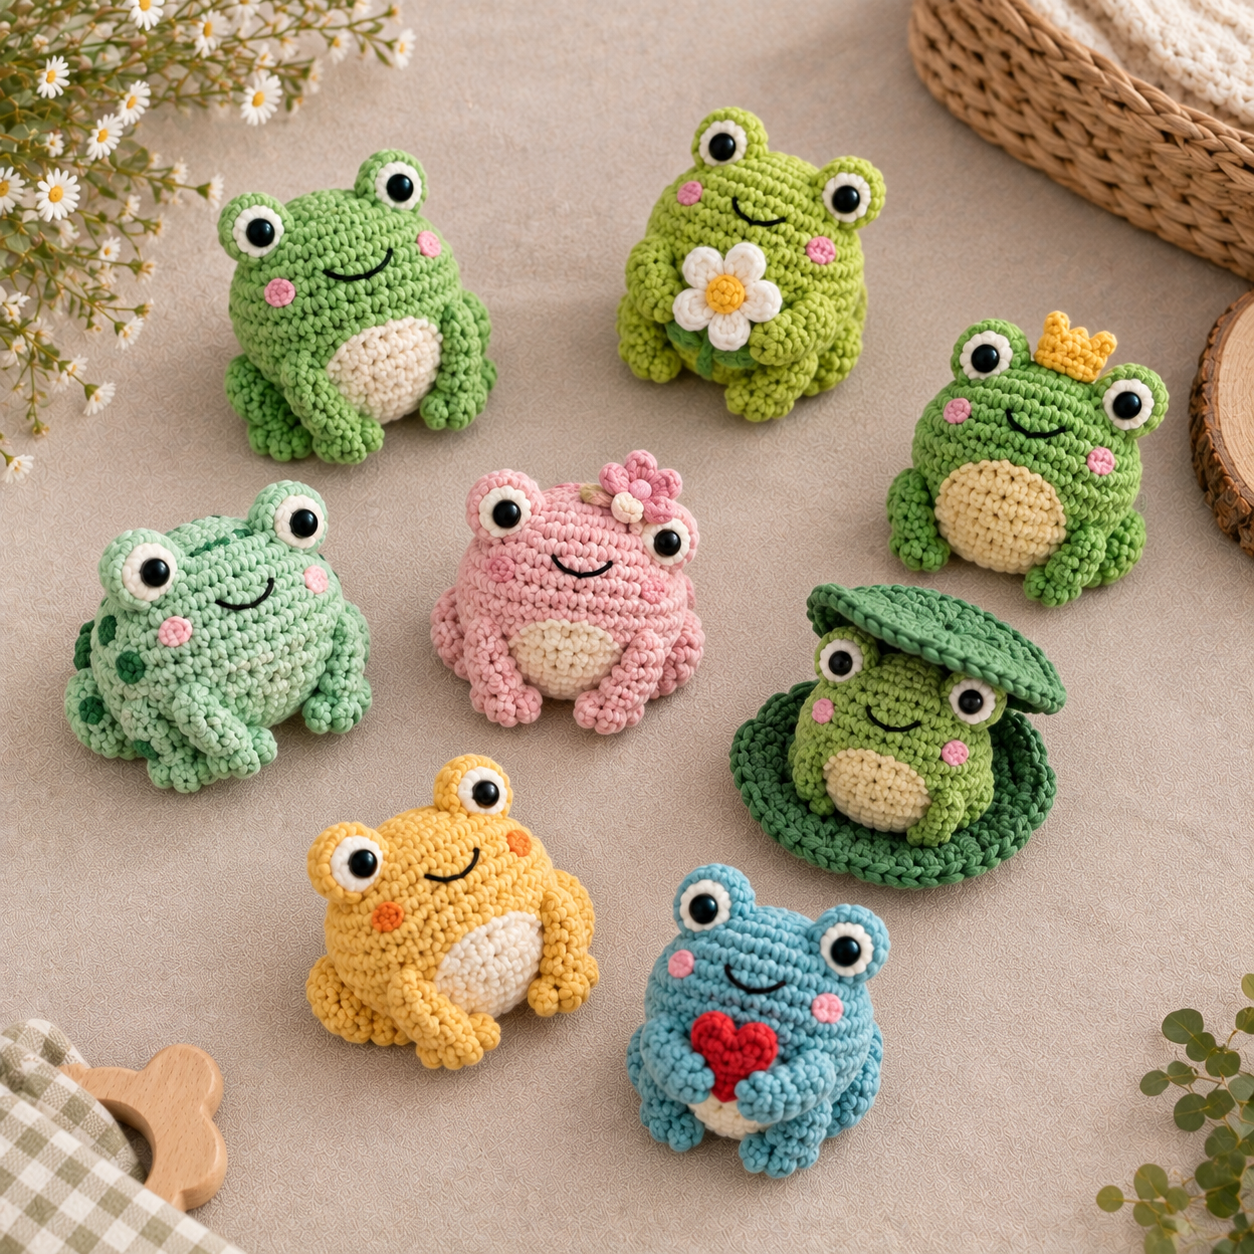
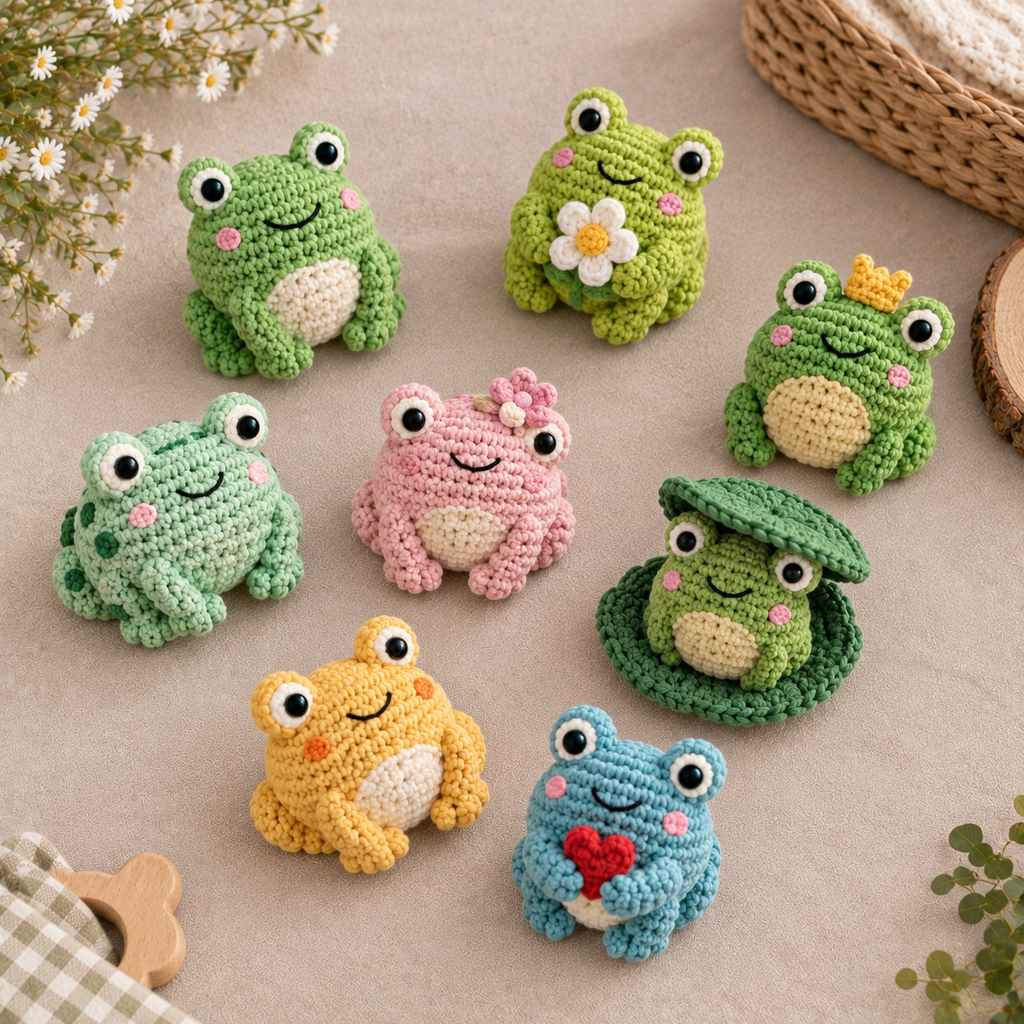
Frogs have one anatomical quirk that makes them instantly recognizable in amigurumi form: their eyes sit up on top of the head rather than on the front of the face like most animals. Here are 7 crochet frog patterns that are almost too cute, along with a look at why eye placement matters so much for getting the shape right.
Why Eye Placement Makes or Breaks a Frog Design
On a real frog, the eyes bulge up and outward from the top of the skull, which lets the animal see almost everything around it while staying mostly submerged in water. In crochet form, that translates to two small rounded bumps worked on top of the head, each with an eye attached to its outer surface, rather than a pair of eyes placed flat on the front of the face the way you’d position them on a bear or a cat. Skipping this detail and placing the eyes on the front of the head instead is one of the most common reasons a frog amigurumi ends up looking more like a generic round creature than a frog specifically.
7 Crochet Frog Patterns to Try
1. The Bumpy Toad-Textured Frog
Small, irregular bobble stitches scattered across the back and sides give this design a rougher, wartier texture that reads more like a toad than a smooth-skinned frog. It’s a good project for practicing textured stitches on a shape you may already be familiar with.
2. The Frog Prince
A plain green frog body finished with a small golden crown worked separately and perched between the eye bumps gives this design a storybook charm. The crown is a quick, simple piece, so most of the effort still goes into the base frog shape underneath.
3. The Poison Dart Frog
Bold, saturated colors like electric blue, bright yellow, or vivid red, worked in solid blocks or bands rather than a single green shade, recreate the striking warning colors seen on real poison dart frogs. Since these frogs come in such varied real-life color combinations, there’s a lot of room to experiment with your own version.
4. The Frog on a Lily Pad
A small frog worked to sit on top of a separately crocheted round, flat lily pad, sometimes with a tiny flower attached to one side, turns a single frog figure into a small pond-themed scene. The lily pad is a quick, flat piece, so it doesn’t add much time to the project as a whole.
5. The Long-Legged Leaping Frog
Worked with noticeably longer, slightly bent hind legs positioned as if mid-jump, this design captures a frog in motion rather than at rest. Getting the bent leg angle to look natural rather than stiff takes a bit more attention than a standard sitting pose.
6. The Frog in a Raincoat
A plain frog body dressed in a tiny separately crocheted raincoat and sometimes a small hood, this design leans into the playful irony of a frog dressed for weather it’s naturally built to handle. The raincoat is worked as its own piece and slipped over the body, so the frog itself can stay simple.
7. The Sticky-Toed Tree Frog
Bright green with small rounded pads worked at the tip of each toe, this design nods to a real tree frog’s adhesive toe pads, which let it cling to leaves and branches. The toe pads are small added details rather than any real shaping challenge, but they give the design a distinct, species-accurate look.
Tips for Getting Frog Proportions Right
Keep the eye bumps proportionally large compared to the rest of the head, since a real frog’s eyes take up a surprising amount of its skull, and a design with eyes that are too small will read as a generic amphibian rather than a frog specifically. For the legs, a slightly bent resting position, rather than perfectly straight, tend to look more natural and froglike, even on a design that isn’t meant to be mid-leap.
Common Questions
Why Do Frog Amigurumi Have Eyes on Top of the Head Instead of the Front?
It mirrors real frog anatomy, where the eyes sit high on the skull to give the animal a wide field of view while it stays mostly submerged in water. Placing the eyes on small raised bumps rather than flat on the face is what makes a crochet frog read clearly as a frog.
What’s the Difference Between a Frog and a Toad Pattern?
Mostly textured. A frog design typically uses smooth stitching for sleek, moist-looking skin, while a toad design adds bumpy bobble stitches across the body to suggest the rougher, drier texture real toads have. The basic body shape underneath is usually the same for both.
How Long Does It Take to Crochet a Frog?
Most standard-sized frogs take somewhere between 2 and 4 hours, with more detailed designs like the poison dart frog’s multiple color changes or the leaping frog’s bent-leg shaping generally taking a bit longer than a simple sitting frog.
What Yarn Works Best for a Frog Amigurumi?
A worsted-weight cotton or cotton-blend yarn holds its shape well and gives clean color definition, which matters for a design like the poison dart frog that binds on bold, distinct color blocks. Acrylic works fine too for a softer, more huggable version.
Are These Frog Patterns Safe for Young Children?
With a few adjustments, yes. Skip small plastic safety eyes and beads in favor of embroidered features for anything meant for a very young child, and make sure any small attached pieces, like a crown or toe pads, are sewn on securely.
How Much Yarn Does a Frog Amigurumi Use?
Most standard-sized frogs use somewhere between 100 and 200 yards of worsted-weight yarn, with a design that includes extra pieces, like the lily pad scene or the raincoat, using a bit more because of those added elements.
Can I Combine Two of These Frog Ideas Into One Design?
Yes, and it’s an easy way to make a pattern feel more personal. A tiny crown added to a poison dart frog’s bold colors, or a raincoat draped over a bumpy toad texture, are both simple ways to mix ideas from this list without starting an entirely new pattern.
Final Thoughts
A frog’s most distinctive feature is hiding in plain sight on top of its head, and getting that eye placement right is what convincingly separates a frog from a generic round creature. Pick whichever style or personality appeals most, and you’ll have a genuinely charming little frog ready before long.