Sometimes, the smallest detail can make a handmade crochet project look completely different. You’ve finished a blanket, scarf, cardigan, or dishcloth, but the edges still feel a little too plain. Instead of adding a complicated border, why not try a stitch that creates a beautiful finish with just a few simple steps?
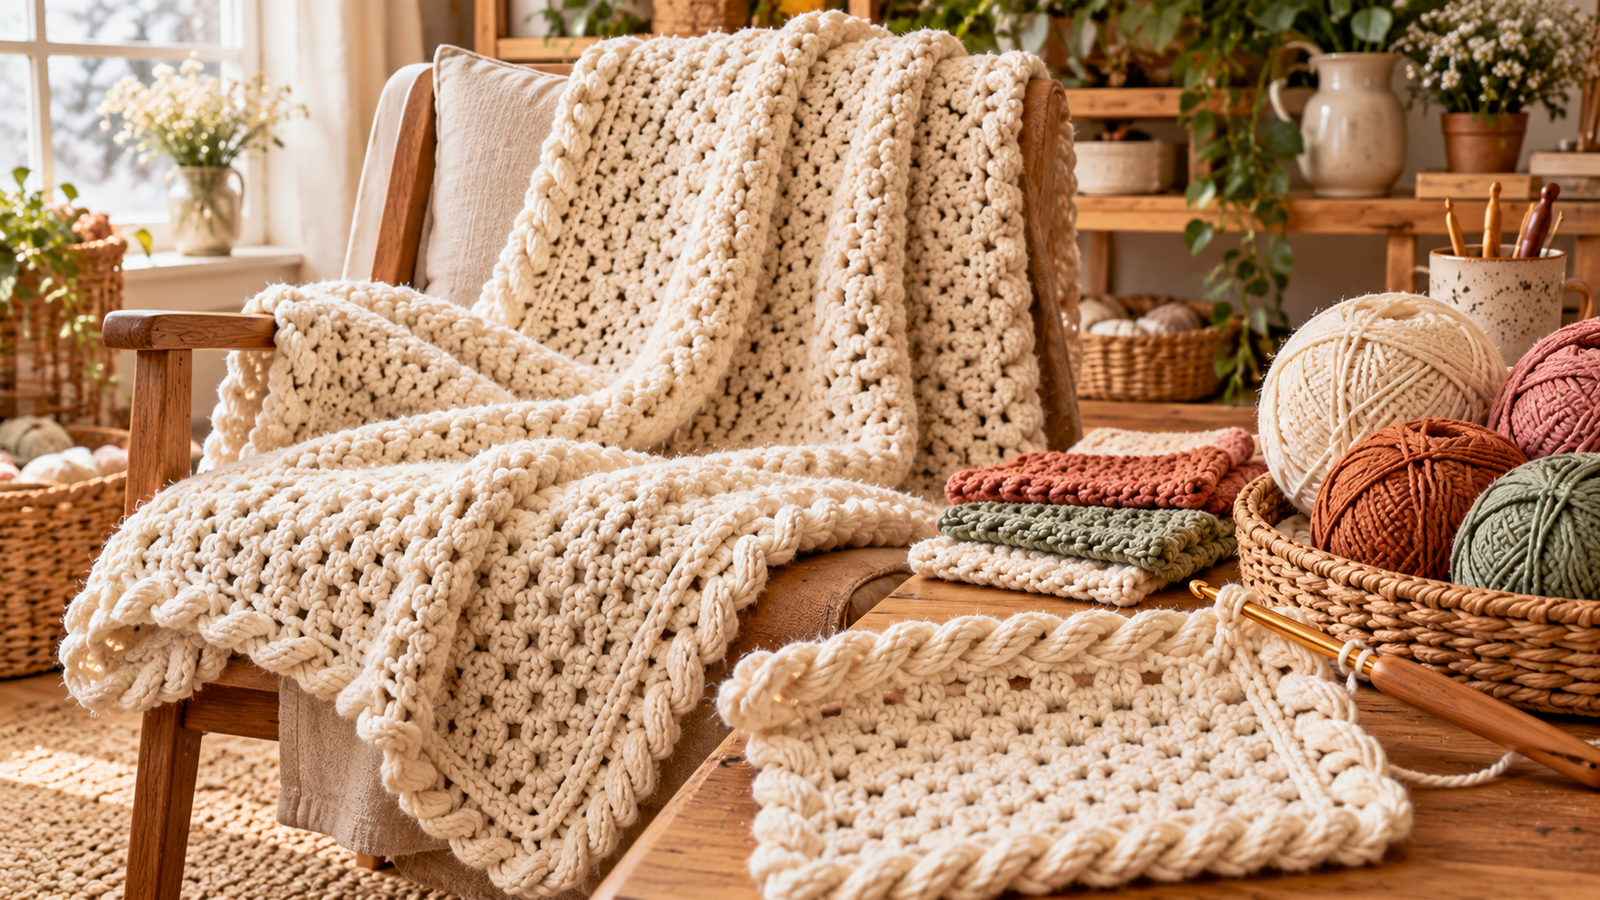
Crab stitch crochet edging is a lovely way to give your projects a neat, twisted-looking edge. It creates a subtle cord-like texture that stands out without overwhelming the main design. Even better, it works with many different crochet projects, from cozy winter accessories to practical items for your home.
Also called reverse single crochet, crab stitch is worked in the opposite direction from regular single crochet. This unusual movement might feel awkward at first, but once you understand the technique, it can become a useful finishing stitch in your crochet collection.
Whether you’re a beginner looking for a new technique or an experienced crocheter searching for a fresh finishing touch, this guide will help you understand crab stitch edging, explore ways to use it, and avoid common mistakes.
What Is Crab Stitch Crochet Edging?
Crab stitch is a crochet technique that creates a compact, twisted-looking row along the edge of a project. Unlike ordinary single crochet, which is generally worked from right to left by a right-handed crocheter, crab stitch moves in the opposite direction.
This reverse movement makes the stitches twist slightly, forming a decorative cord-like finish. The result is a border that looks defined and tidy without requiring multiple rows of complicated stitches.
Crab stitch is often used as a final edging rather than as the main fabric of a project. Because the stitches sit close together, it can help give an edge a more finished appearance.
You can work crab stitch in the same color as your project for a subtle finish or choose a contrasting shade to make the border stand out.
Why You’ll Love Adding Crab Stitch to Your Crochet Projects
There are plenty of reasons to keep crab stitch in mind when finishing your next handmade creation.
It creates a polished edge. The compact texture gives many crochet pieces a more deliberate, finished appearance.
It works with simple designs. You don’t need an elaborate blanket or garment pattern to enjoy this edging. Even a basic rectangle can look more interesting with a carefully worked border.
It uses relatively little yarn. Since crab stitch is often worked as a single finishing row, it can be a practical option when you have a small amount of yarn left.
It adds texture without a wide border. If you like the look of a decorative edge but don’t want to add several rows, crab stitch offers a more compact alternative.
It suits different styles. The same stitch can look rustic with natural yarn, elegant with a smooth neutral shade, or playful with a bright contrasting color.
Keep in mind that crab stitch does not automatically flatten every uneven edge. Your stitch count, tension, and the shape of the original project still matter.
How to Crochet Crab Stitch Edging Step by Step
If you’ve never tried crab stitch before, start with a small swatch or a project with a straight edge. Practicing on a simple piece makes it easier to understand the reverse direction before working around a larger item.
Materials You’ll Need
- Yarn suitable for your crochet project
- A crochet hook appropriate for the yarn
- Scissors
- A yarn needle for weaving in the ends
For your first attempt, use a smooth, light-colored yarn. It will make the individual stitches easier to see and help you identify where to insert your hook.
Step 1: Prepare Your Crochet Edge
Finish the main body of your project and make sure the edge is ready for the border. If the pattern calls for a separate round of single crochet first, complete that round before beginning crab stitch.
For a first practice piece, a straight edge is easier to manage than a corner or a curved section.
Step 2: Make a Starting Loop
Attach your yarn at the edge where you want to begin. Make a chain of one if needed to bring the yarn to a workable height.
Unlike many other crochet borders, crab stitch does not usually require a long starting chain. The exact starting method may vary slightly depending on the pattern.
Step 3: Work in the Opposite Direction
This is the most important part of the technique.
Instead of inserting your hook into the next stitch to the left, as you would with ordinary single crochet when working right-handed, move toward the stitch on the right.
Insert your hook into the appropriate stitch, yarn over, and pull up a loop. You should now have two loops on your hook.
Step 4: Complete the Stitch
Yarn over again and pull through both loops on your hook.
That completes one crab stitch.
The stitch may feel unusual because your hook is moving against your normal crochet direction. Take your time and avoid pulling the yarn too tightly.
Step 5: Continue Along the Edge
Repeat the same movement, inserting your hook into the next available stitch toward the right.
Continue along the edge until you reach the end. The stitches should form a compact, twisted-looking line.
If the border begins to curl or feels extremely stiff, check your tension. You may be pulling the working yarn too tightly or placing too many stitches into the edge.
Step 6: Finish and Secure Your Yarn
Once you reach the end, fasten off the yarn and weave in the loose end with a yarn needle.
Take a moment to inspect the border. A good crab stitch edge should look reasonably consistent, with a defined texture that complements the main fabric.
Beginner tip: Don’t worry if your first row looks uneven. Crab stitch can take a little practice because the reverse movement feels unfamiliar. Try several rows on a swatch before using it on a favorite project.
8 Beautiful Ways to Use Crab Stitch Crochet Edging
Once you understand the basic movement, you can experiment with crab stitch on many different projects. Here are eight ideas worth trying.
1. Add a Twisted Border to a Crochet Blanket
A blanket is one of the most satisfying projects for trying a new edging technique. If your blanket already has a simple stitch pattern, crab stitch can add a narrow, textured finish without distracting from the main design.
For a classic look, use the same yarn color as the blanket. If you want a stronger contrast, try a cream border on a dark blanket or a deep green edge on a neutral design.
Before working around all four sides, check whether your blanket needs a preparatory round to make the edges more even. This is especially helpful if the sides contain different stitch structures.
Style idea: Use crab stitch on a solid-color blanket with a simple body so the texture of the border becomes a small but noticeable detail.
2. Finish a Crochet Scarf
A scarf can sometimes look unfinished when its ends are left plain, particularly if the body uses a simple stitch pattern.
Crab stitch gives the short ends a defined edge without adding a wide decorative band. It can also work along the long sides if the design benefits from a narrow outline.
Choose a yarn that matches the scarf’s weight and softness. A very thick edging on a lightweight scarf may feel stiff, while a delicate border can be difficult to see on a bulky fabric.
Style idea: Try a matching crab stitch edge on a ribbed or textured scarf for a subtle finish that doesn’t compete with the main stitches.
3. Give Crochet Dishcloths a Neat Finish
Dishcloths are useful projects for practicing edging because they are relatively small and easy to handle.
A crab stitch border can add a decorative outline to a simple cotton dishcloth. Choose a contrasting color if you want the edge to stand out, or keep it tonal for a more understated look.
Since dishcloths are frequently washed, use yarn appropriate for the intended purpose and follow its care instructions. Cotton is a common choice for practical kitchen crochet.
Style idea: Make a set of dishcloths in coordinated colors, then finish each one with the same crab stitch border for a consistent appearance.
4. Add Detail to Crochet Cardigans
A narrow crab stitch edge can work beautifully along selected areas of a cardigan, depending on the garment construction and the pattern.
Consider using it along the front opening, around a simple neckline, or at the edge of a pocket. The twisted texture can help define these areas without adding a bulky decorative border.
However, clothing requires extra attention to flexibility and fit. A tight edging may pull the fabric inward or make the opening less comfortable to wear.
Style idea: Use a matching color for a minimalist cardigan or a contrasting shade to outline the front opening.
Before applying crab stitch to a finished garment, test the technique on a swatch made with the same yarn and stitch pattern.
5. Decorate Crochet Pillow Covers
A simple pillow cover can look more distinctive with a small detail around its edges. Crab stitch is especially suitable for designs where you want the border to remain narrow and understated.
For example, a cream pillow with a caramel edge can create a warm, natural look, while a gray pillow with a charcoal border feels more modern.
You can use the edging around the front panel or along the visible seam, depending on how the cover is constructed. Make sure the border doesn’t interfere with the opening if the pillow cover needs to be removed.
Style idea: Coordinate the edging with another color in your living room, such as the shade of a throw blanket or nearby cushion.
6. Finish Crochet Baby Blankets
Crab stitch can add a delicate finishing detail to a baby blanket, particularly when the main fabric is simple.
Soft neutral shades and gentle pastels work well for this type of project. A matching border creates a subtle finish, while a slightly deeper shade can define the outline.
Choose yarn that is appropriate for a baby blanket and follow the manufacturer’s washing instructions. Keep the edging simple and avoid adding loose decorations that could detach.
Style idea: Pair a pale sage or cream blanket with a narrow border in the same shade for a clean, timeless appearance.
As with any baby textile, a decorative blanket should not be used as loose bedding for an unattended infant.
7. Outline Crochet Coasters
Coasters are excellent small projects for experimenting with crab stitch. The border can emphasize the shape of a square, rectangle, or circle without requiring a large amount of additional yarn.
For round coasters, pay attention to the number of stitches around the edge. You may need to adjust your approach depending on the stitch pattern and shape to avoid creating a wavy or puckered border.
A contrasting color can make a coaster set look more coordinated, especially if the main body uses a neutral yarn.
Style idea: Create a set of coasters in different colors and use one shared border shade to bring the collection together.
8. Add a Decorative Edge to Crochet Bags
A crochet tote or small pouch can benefit from a narrow crab stitch finish around the top opening.
The twisted row provides a visible outline that can complement a simple bag design. It works particularly well when the body uses a basic stitch pattern and the edging is intended to be a finishing detail rather than the main decoration.
Choose a yarn suited to the bag’s intended use, and pay attention to the strength of the handles and seams. Crab stitch can improve the appearance of an edge, but it should not be treated as a substitute for proper reinforcement.
Style idea: Try a natural-colored tote with a dark edging for a clean contrast, or use the same shade throughout for a minimalist handmade look.
Common Crab Stitch Mistakes and How to Fix Them
Crab stitch may look simple once finished, but the reverse movement can cause a few problems while you’re learning.
Working in the Wrong Direction
The defining feature of crab stitch is that it is worked in the opposite direction from regular single crochet for a right-handed crocheter.
If the border looks like an ordinary row of single crochet rather than a twisted edge, check your direction and hook placement.
Left-handed crocheters will generally mirror the movement, so the opposite direction may look different depending on which hand holds the hook.
Pulling the Yarn Too Tightly
Tight stitches can make the border stiff and may cause the edge to curl inward.
Try relaxing your grip and drawing the loops through without pulling the working yarn excessively tight. If necessary, experiment with a slightly larger hook on a practice swatch.
Adding Too Many Stitches
If you insert your hook into every small gap along an uneven edge, you may create more stitches than the fabric can comfortably accommodate.
Follow the pattern’s instructions for stitch placement. When working along a side edge, the correct spacing may differ from the spacing used along a row of ordinary crochet stitches.
Skipping Stitches
Because crab stitch moves backward, it can be easy to lose track of the next stitch.
Work slowly at first and inspect the edge every few stitches. Using a light-colored yarn can also help you identify where to insert your hook.
Ignoring the Corners
Corners can be tricky because the fabric changes direction. Adding too many stitches can make the corner flare, while too few can pull it inward.
The correct treatment depends on the project’s shape and the pattern. Practice on a small sample and check whether the corners lie flat before finishing a larger item.
Tips for Choosing the Right Yarn and Hook
The yarn and hook you choose can change the appearance of crab stitch considerably.
Use a compatible yarn weight. A border made with much thicker yarn than the main fabric may look bulky and distort the edge.
Match the texture to the project. Smooth yarn makes the individual stitches easier to see, while fuzzy yarn can soften the twisted effect.
Test your hook size. If your edging feels rigid, try a different hook size on a swatch and compare the results.
Consider contrast carefully. A contrasting shade makes the border more noticeable, but a matching color emphasizes texture without creating a strong outline.
Check the finished fabric. The best edging is one that complements the project while allowing the fabric to keep its intended shape.
Frequently Asked Questions
Is crab stitch crochet edging suitable for beginners?
Yes, although the reverse direction can feel awkward at first. Beginners who already know how to make a single crochet stitch can learn crab stitch by practicing on a small swatch.
What is another name for crab stitch?
Crab stitch is commonly known as reverse single crochet because it uses a single crochet technique worked in the opposite direction.
Can I use crab stitch on any crochet project?
It can be used on many projects, including blankets, scarves, dishcloths, pillow covers, and bags. However, the best choice depends on the fabric. A tight border may not suit a delicate or highly flexible garment, so testing it first is worthwhile.
Does crab stitch use a lot of yarn?
A single row generally requires less yarn than a wide, multi-row border. The exact amount depends on the size of the project, yarn thickness, hook size, and stitch tension.
Why is my crab stitch edging curling?
Curling can happen when the stitches are too tight or when the number and placement of stitches do not suit the edge. Try loosening your tension and checking the stitch spacing. A practice swatch can help you identify the problem before changing the finished project.
Can I use a different color for crab stitch edging?
Absolutely. A contrasting color can make the twisted texture stand out, while a matching shade creates a more subtle finish. Both approaches work well, depending on the style you want.
Final Thoughts
Crab stitch crochet edging is a simple technique that can make a meaningful difference to the appearance of a handmade project. Its compact, twisted texture gives many crochet pieces a neat finish without requiring a wide or complicated border.
From blankets and scarves to dishcloths, pillow covers, and bags, there are plenty of ways to experiment with this versatile stitch. You can keep the edging understated with a matching color or turn it into a decorative feature with a contrasting shade.
If you’re trying crab stitch for the first time, begin with a small swatch and focus on mastering the reverse movement. Once you become comfortable with the technique, you’ll have another useful finishing option to consider whenever a project needs a little extra detail.
Sometimes, the final row is what makes a crochet project feel complete. Give crab stitch a try on your next creation and see how this small detail transforms the finished edge.